Tuesday, May 28, 2013
I am so sorry for not having a post lately. Believe me, it's not for lack of a topic, or desire; I'm just having a super hard time finding time to sit down & write! But, school is almost done (yeee!!!), and things will be winding down in the house. I'm really excited about the next several posts. I have so much I want to share! Please check back over the weekend, I will hopefully have the next "Catching Up" post. Thank you for your patience!
Monday, May 13, 2013
3 months!
In all the hullabaloo of trying to finish school on time, and having Revival Meetings at church, I've not really had the time to do a real post. BUT! I did not want it to go without mentioning, that my baby girl is growing up so fast!! It's hard to believe, but she's 3 months old today. *sigh* I wish I could stop the world from spinning for a bit & hold on to this time for as long as I could get away with it. But, it is what it is: time marches on. So, I shall enjoy every minute. I will squeeze her squishy infant body a bit tighter. I will enjoy the days she won't let me put her down. I will smell her & touch her as often as possible. I will tell her I love her every chance I get. And, of course, I will take as many photos & video as I can! I love her so much. God is FAR too good, to give her to me!!!
 |
| 3 months old!!!! |
Tuesday, May 7, 2013
Adventures in Breadmaking
In an attempt to cut back wherever possible, I have decided to take on the challenge of making our sandwich and dinner roll bread. If it works, I'll be saving us loads of money! If not, well, at least I can say I tried, and I'd only be out 10 bucks.
I totally forgot to take pictures throughout my first attempt, but here's the result.

They didn't turn out *too* bad; but they definitely did not turn out the way I intended. After talking with a few of my friends (including the one who gave me the recipe), I came to the conclusion that I did not let the bread rise enough. The bread tasted fantastic! But, because they did not rise enough, the loaves were super dense and had a squishy texture in the middle. Not good enough for sandwiches, but they worked out great for snacking! We gobbled up all four loaves in 3 days!
Well, today, I decided to give it another go & I'm glad I did! I still need to keep a better eye on the rising, but I am pleased with the results. And, I remembered to take pictures this time!
First, I pulled out my mixer, put the kneading hook on & gathered up all my ingredients.
 |
| Flour, sugar, yeast, salt, olive oil, warm water |

I put the warm water into the mixer, added the yeast & let it sit for a few minutes.

While that was sitting, I combined the rest of the dry ingredients & mixed them well.
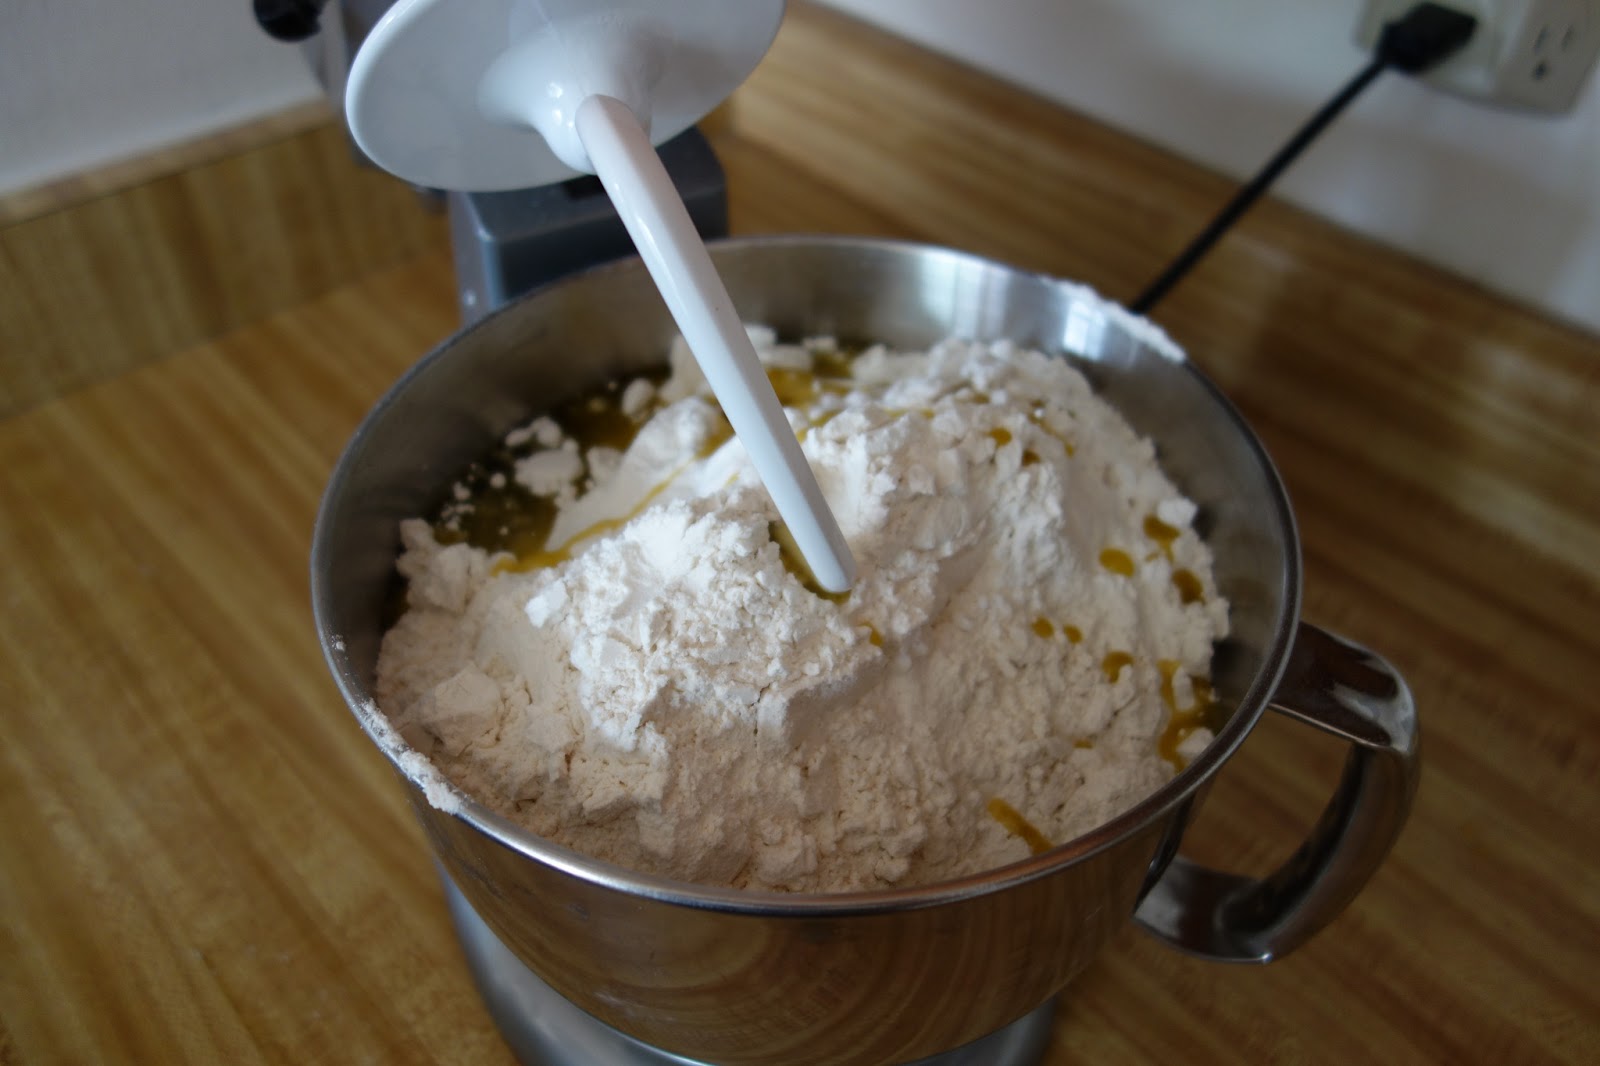
Once the yeast/water was ready, I dumped the dry ingredients into the mixer. When I turned around, I saw the oil! I probably should have tossed that in before the dry ingredients, but I don't think it really mattered.

I put the mixer on "stir" for a minute, then put it up to 2 for 2 minutes. The dough came out perfect!

I decided to only do 2 loaves this time, so I halved the dough.

I took one of the halves & split it again, into the shape of 2 loaves....

...I placed them on a plate lined with parchment paper & when they were frozen, I put them into a ziploc bag & back into the freezer to bake another day.

I placed the other half of the dough into a bowl & then placed it into a warmish oven to rise for about 25 minutes. (I left the oven door open. I was afraid it would start to bake! lol)

I can't believe I didn't take a picture of it, but once the dough had had doubled in size, I shaped it into 2 loaves. I placed each one in a greased (I used Pam) bread pan.....

....then back into the warmish oven for the second rise.

I kept the bread in the warmish oven for 15 minutes. Then, I placed them on top of the oven, to finish raising (is that a word?) while the oven pre-heated.

Here's what they looked like just before going in the oven. Looks good, so far!

I baked them for 20 mins & put them on the counter to cool. Here's what they look like from the side....

Pretty good, right?! The one on the left was a bit too short & was more dense than I wanted. But, it was way better than before! The loaf on the right was more of what I was looking for. I think I needed them to rise a bit longer, but all in all, they turned out great! I'm looking forward to getting this right & making this work. The bread is super tasty & will be great for sandwiches & rolls!
Here's the recipe I used. It makes 4 loaves. OH! Make note that the original recipe calls for INSTANT yeast. I bought DRY ACTIVE yeast & that's why I had to do the double rise. If you use the instant yeast, follow the directions below. If you use the dry active yeast, then you'll need to do what I did, and have the dough rise twice. Once in the bowl & then again in the loaf pans.
Ingredients: 10 1/2 cups white unbleached bread flour (a 25lb bag of flour is only 7 bucks at Costco! That's the same price as 2 loaves of bread! What a savings!)
1/2 cup sugar
1 tbsp salt
3 rounded tbsp Instant Yeast (This also can be purchased at Costco. It was $5, and will last quite a while)
3 tbsp liquid lecithin* (veg. or olive oil ok to use. I used olive oil.)
4 cups warm tap water
Instructions: Mix dry ingredients. Add lecithin/oil and water. Mix for 1 minute and check consistency. If dough is too dry, add more water. If dough is too moist, add more flour. Mix for 5 minutes. If you have a Kitchenaid mixer, you'll only need to mix for 2 minutes. (Do not add water or flour to the dough after it has finished mixing.)
To cook now- Spray counter and pans with Pam. Shape loaves and cover with a dish towel. Let raise 25 minutes, or until dough has doubled in size. Bake at 350 degrees for 20-25 minutes.
To freeze- form the bread into the shape that you will be cooking it in (rolls, bread-sticks, or a loaf) and put in freezer on a cookie sheet until stiff. Take off of the cookie sheet and place in a labeled freezer bag. Leave rolls out approximately 3 hours before cooking and bread about 4. Add toppings (cheese or spices) to the bread-sticks just before baking.
***For wheat bread: Use 3 cups water and 1 cup applesauce. I also exchange my white sugar for brown sugar and add some honey for honey wheat. I tend to allow my wheat bread far more rise time in an effort to keep it from being too dense.
I have no idea the actual cost of each loaf, but I'm guessing it's just over a buck. NICE! Not only will we have great tasting bread, but it will be made with only real ingredients, and will be saving us money. I think I hit the jackpot with this one! =D
Friday, May 3, 2013
My New Favorite Tool!
I know I may sound like a commercial, but I'm so in love with this product!! Lemme tell ya', I've been struggling with my crap machine for a really long time. My piecing just never seems to be as good as it should be. Points not matching up, rows totally crooked, blocks not turning out the right size, bla, bla, bla. For someone who's been quilting as long as I have, it's SO FRUSTRATING for the finished product to look like a total n00b put it together! I can't tell you how many times I've had to give a quilt with an apology! lol!! I tried presser foot after presser foot. I bought several guides. I even bought those magnetic doohickeys. I spent far too much money on far too many tools, all in an attempt to achieve that perfect scant 1/4" & ruler-straight line. Eventually, I came to the conclusion, that either I was the world's worst quilter or there was something wrong with my machine. After putting the machine away in frustration, and walking away from all of my projects for a year, I was determined to find out the answer. Well, after trying all of my tools again, and getting the same results, I'm convinced it's the machine. I think (even tho' I can't prove it) that my needle is set ever-so-slightly to the L of where it should be AND I know my feed dogs aren't working properly. We'll talk about the feed dog thing in another post, but no wonder none of those tricks worked for my seams!! The distance from the actual needle, to the edge of the presser foot, was off! Now, I was at a loss. If the machine itself was the problem, how was I to fix it?!
Enter, Pinterest. Yes! Really, again! lol! I happen to follow several quilters & one of them pinned this tool. I read the post & decided it was worth investigating. So, I googled it, and found a couple videos on how to use it. After watching the videos, and finding them for sale on Amazon for a decent price, I decided to give it a shot. I'm so glad I did! It is the best quilting tool I've ever purchased!!!
 <--- Well, here it is! It's sorta hard to see how it works from just this photo, so I totally recommend going to the video link above.
How this differs from any of my other tools, is that it attaches, more specifically, it sticks to the bottom of the actual presser foot!! Why I think this worked for me, is because you have the scant 1/4" measured from the actual needle to the outside line - not from the edge of a tool to the needle. Do you see the small hole? Well, that's where the needle goes. Just make sure the solid line down the middle lines up, and Bam! Perfect seams!
I'm tellin' ya, I think my needle is off-center! Once I put this on my presser foot & started sewing my half-square triangles, I could not believe the accuracy!! I actually had to square down the blocks for the first time ever! All of my points were perfect. All of them! I was so happy!! After years of struggling, I had finally found something to help me achieve that perfect seam! YAY!
If you read all the info about the Sew Easy Guide, you'll see that it's original purpose was for sewing half & quarter square triangles without marking. I do have to mention, that my half square triangles were far too big (10") for the tool. I still had to draw the diagonal line down the block. But! That was the only marking I had to do! I just lined up the solid line from the tool, with the solid line on my block & the tool helped me keep it all straight! It's so simple, it's genius.
If you're havin' issues with your seams, or just hate drawing all those ridiculous lines for your half & quarter square triangles, I highly recommend purchasing this. It comes in 2 sizes. I got both! Thanks, again, Pinterest!
Enter, Pinterest. Yes! Really, again! lol! I happen to follow several quilters & one of them pinned this tool. I read the post & decided it was worth investigating. So, I googled it, and found a couple videos on how to use it. After watching the videos, and finding them for sale on Amazon for a decent price, I decided to give it a shot. I'm so glad I did! It is the best quilting tool I've ever purchased!!!

How this differs from any of my other tools, is that it attaches, more specifically, it sticks to the bottom of the actual presser foot!! Why I think this worked for me, is because you have the scant 1/4" measured from the actual needle to the outside line - not from the edge of a tool to the needle. Do you see the small hole? Well, that's where the needle goes. Just make sure the solid line down the middle lines up, and Bam! Perfect seams!
I'm tellin' ya, I think my needle is off-center! Once I put this on my presser foot & started sewing my half-square triangles, I could not believe the accuracy!! I actually had to square down the blocks for the first time ever! All of my points were perfect. All of them! I was so happy!! After years of struggling, I had finally found something to help me achieve that perfect seam! YAY!
If you read all the info about the Sew Easy Guide, you'll see that it's original purpose was for sewing half & quarter square triangles without marking. I do have to mention, that my half square triangles were far too big (10") for the tool. I still had to draw the diagonal line down the block. But! That was the only marking I had to do! I just lined up the solid line from the tool, with the solid line on my block & the tool helped me keep it all straight! It's so simple, it's genius.
If you're havin' issues with your seams, or just hate drawing all those ridiculous lines for your half & quarter square triangles, I highly recommend purchasing this. It comes in 2 sizes. I got both! Thanks, again, Pinterest!
A Quilt for Alice
Last year, a good friend of mine became pregnant with her first baby -
a girl! I could not wait to make a quilt for her! So, I did the usual: I
picked out some cute fabric, cut simple squares & pieced a lovely
baby quilt. On a whim, I decided to back it with minky. What was I
thinking?! How was I going to quilt that on my finicky machine?! *sigh*
My machine totally ate it. Seriously. It got so stuck in the feed dog cavity (if that's what
it's called lol), that when I finally freed it, there was a huge hole.
Ugh! I was so mad!! My friend was moving from one coast to the other,
and the shower was my last chance to see her before the big move &
baby's arrival. I decided I would just have to start from scratch &
maker her one later.
It totally would have happened...except I got pregnant. doh! Morning/noon/night sickness, extreme fatigue, the works. On top of that, Dan traveled for 4 solid months and I was homeschooling. Even tho' I really wanted to, there was no way I was going to have the time or energy to quilt. But, everything has a season, right? So, when the pregnancy was just about done & as I began to plan the quilt for my baby girl, I decided to go ahead & plan a replacement quilt, as well. Then, when my girlfriend said she was coming back for a visit, I knew it was time. So, I got to work!
I had a blast picking out fabric, choosing the pattern & sewing this quilt. My biggest issue was with the quilting. Back to that blasted feed dog problem. It was getting stuck - again! Even with just regular cotton backing. Ugh! This time, I decided not to force it. I took it off the machine, ripped the stitches I had sewn & hand tied it. You know, it turned out great!! I'm super happy with the results. For the first time ever, I could give a quilt without an apology! haha!


You know, life is constantly changing. Friends come, and they go. Sometimes the Lord moves you, and sometimes He moves the friend. But, a quilt...it moves right along with you, and it brings with it, the memories & the love of the one who made it. I put a whole lot of love into this one & I'm quite happy to let it go.

It totally would have happened...except I got pregnant. doh! Morning/noon/night sickness, extreme fatigue, the works. On top of that, Dan traveled for 4 solid months and I was homeschooling. Even tho' I really wanted to, there was no way I was going to have the time or energy to quilt. But, everything has a season, right? So, when the pregnancy was just about done & as I began to plan the quilt for my baby girl, I decided to go ahead & plan a replacement quilt, as well. Then, when my girlfriend said she was coming back for a visit, I knew it was time. So, I got to work!
I had a blast picking out fabric, choosing the pattern & sewing this quilt. My biggest issue was with the quilting. Back to that blasted feed dog problem. It was getting stuck - again! Even with just regular cotton backing. Ugh! This time, I decided not to force it. I took it off the machine, ripped the stitches I had sewn & hand tied it. You know, it turned out great!! I'm super happy with the results. For the first time ever, I could give a quilt without an apology! haha!
"Through the Looking Glass" - a quilt for Alice.

It turned out super cute. I'm really happy with every part of it.


You know, life is constantly changing. Friends come, and they go. Sometimes the Lord moves you, and sometimes He moves the friend. But, a quilt...it moves right along with you, and it brings with it, the memories & the love of the one who made it. I put a whole lot of love into this one & I'm quite happy to let it go.
Awww...don't you just love that happy face?! Man, I really do love quilting!! =D

Two Small Words With One Big Impact
You know that Bible story you could teach from memory, because you've taught it a zillion times? Well, having taught Sunday School & Children's Church for nearly 10 years, I have a lot of those. Currently, our Sunday School lessons have us in 1 Kings & this past Sunday, my lesson was on Elijah & the Widow Woman. I'm sure you're familiar with that one, too. If not, tho, here's the story in a nutshell:
It's a great passage, with a fantastic lesson! I already knew that. But, it's one thing to know something, and a completely different thing to live it. Now, I know without a doubt that God will provide. He has fulfilled every need we've ever had, and sometimes in miraculous ways! That's not really my problem. The struggle is living it.
Dan & I seem to be in a perpetual state of drought, and I feel as if we've been living at the brook since we got married! We have chosen to follow the path the Lord has for us, regardless of it's earthly consequences, and I'm gonna be honest, it's not easy. Yes, God is still sending the Ravens & no, the stream has not yet dried. But, when will it end? When will God finally say "well done!" and let us leave the brook? I just want to be over this! I want to be on the other side, saying: "look where we were & where we are now!" We give, we serve, we do whatever we can, whenever we can & we do it all for the Lord, without hesitation. He DIED for us! It is our reasonable service! Still, I feel like there must be something we're doing wrong, otherwise, God would be blessing us. Right?! So, I pray harder, read my Bible longer, serve more, give more, etc...and yet, we're still here by the brook. I get so frustrated! How am I supposed to keep living in the drought, while I watch others around me enjoy the rain?! Hasn't God promised to open the windows of Heaven & pour out blessings?! When's that gonna happen to us?! It's happening to everyone else! *sigh* It's so hard, and even tho I struggle, I keep on giving, serving, praying, etc. Mostly, because it's just the right thing to do.
As I stood there, teaching my class on the provisions of God, I couldn't help but be convicted. The funny thing is, that it didn't even come from the scripture! It came from the actual lesson. As I was reading it to the girls, this last sentence from the lesson completely jumped off the page, and slapped me right in the face.
"God kept putting just enough meal in the barrel and oil in the cruse for three cakes of bread at each meal. For three years, they had just enough to eat, until the famine ended."
Now, I'm not a Bible scholar. I have no idea how the writers of the Sunday School curricula know how much was provided, when, and for how long. But there, in that simple sentence, two little words were all it took to shake me.
They were: "just enough". Elijah and the widow woman had obeyed, and because of it, God was true to His promise and supplied their need. But, what if it really was "just enough?" Where in the passage does God promise them mountains of food & a new car?! It's not there! God promised to provide what they needed, when they needed it, for as long as they needed it, and, that's exactly what He did.
Right there, God reminded me, that we have never gone without a meal. Amazingly, the bills get paid. We've all got clothes & shoes that fit. We've got a roof over our heads & a car that works-ish. Guess what, Amy?! It's just enough! Do we really need more? The simple truth is, no. The World drills into us that, in order to be happy, we have to have it all. But the Bible clearly teaches, that if we have Jesus, we DO have it all!! How foolish and selfish I have been. I've been so focused on what I don't have, that I've lost all enjoyment in what I do have! I have an amazing marriage, with an equally amazing husband. I have 3 healthy, happy boys. I have a DAUGHTER! I have godly parents & a loving family. I get to attend & serve at the best church in the world. But, most importantly, I have a home secured for me in Heaven & the promise of eternal life with my Saviour. When you add it all up, it really isn't "just enough" any more. The windows of Heaven have been opened up for me!! I was just too blinded by my sin to see all the blessings that already surround me.
I'm so glad that the God of Elijah, is my God. I'm thankful that He has not changed, that His Word is truth, and that all of His promises are for me too!!! The drought may continue for years to come. Oh, that I would learn to enjoy His provision - even if it is "just enough."
Elijah has been by the brook Cherith, being sustained by God via the water from the brook & some food from the ravens for quite a while, and now the brook has finally dried. So, God tells Elijah to go to Zarephath, to the house of a widow, and there He would continue to provide for him, until the end of the drought. Elijah gets there & tells the woman to fetch him some water & make him some bread. She, in return, explains to him that she was just about to prepare the last meal for herself & her son. Elijah promises her that God has sent him & would provide. Amazingly, she does as he asks, and prepares what little she has left for this man she's only just met. Even more amazingly, when she goes back to her seemingly empty vessel, there is enough for her & her son! Not only that time, but every time she needs to feed them, there is enough! For 3 years, until the end of the drought, the Lord provides for the 3 of them. Just as He had promised.
It's a great passage, with a fantastic lesson! I already knew that. But, it's one thing to know something, and a completely different thing to live it. Now, I know without a doubt that God will provide. He has fulfilled every need we've ever had, and sometimes in miraculous ways! That's not really my problem. The struggle is living it.
Dan & I seem to be in a perpetual state of drought, and I feel as if we've been living at the brook since we got married! We have chosen to follow the path the Lord has for us, regardless of it's earthly consequences, and I'm gonna be honest, it's not easy. Yes, God is still sending the Ravens & no, the stream has not yet dried. But, when will it end? When will God finally say "well done!" and let us leave the brook? I just want to be over this! I want to be on the other side, saying: "look where we were & where we are now!" We give, we serve, we do whatever we can, whenever we can & we do it all for the Lord, without hesitation. He DIED for us! It is our reasonable service! Still, I feel like there must be something we're doing wrong, otherwise, God would be blessing us. Right?! So, I pray harder, read my Bible longer, serve more, give more, etc...and yet, we're still here by the brook. I get so frustrated! How am I supposed to keep living in the drought, while I watch others around me enjoy the rain?! Hasn't God promised to open the windows of Heaven & pour out blessings?! When's that gonna happen to us?! It's happening to everyone else! *sigh* It's so hard, and even tho I struggle, I keep on giving, serving, praying, etc. Mostly, because it's just the right thing to do.
As I stood there, teaching my class on the provisions of God, I couldn't help but be convicted. The funny thing is, that it didn't even come from the scripture! It came from the actual lesson. As I was reading it to the girls, this last sentence from the lesson completely jumped off the page, and slapped me right in the face.
"God kept putting just enough meal in the barrel and oil in the cruse for three cakes of bread at each meal. For three years, they had just enough to eat, until the famine ended."
Now, I'm not a Bible scholar. I have no idea how the writers of the Sunday School curricula know how much was provided, when, and for how long. But there, in that simple sentence, two little words were all it took to shake me.
They were: "just enough". Elijah and the widow woman had obeyed, and because of it, God was true to His promise and supplied their need. But, what if it really was "just enough?" Where in the passage does God promise them mountains of food & a new car?! It's not there! God promised to provide what they needed, when they needed it, for as long as they needed it, and, that's exactly what He did.
Right there, God reminded me, that we have never gone without a meal. Amazingly, the bills get paid. We've all got clothes & shoes that fit. We've got a roof over our heads & a car that works-ish. Guess what, Amy?! It's just enough! Do we really need more? The simple truth is, no. The World drills into us that, in order to be happy, we have to have it all. But the Bible clearly teaches, that if we have Jesus, we DO have it all!! How foolish and selfish I have been. I've been so focused on what I don't have, that I've lost all enjoyment in what I do have! I have an amazing marriage, with an equally amazing husband. I have 3 healthy, happy boys. I have a DAUGHTER! I have godly parents & a loving family. I get to attend & serve at the best church in the world. But, most importantly, I have a home secured for me in Heaven & the promise of eternal life with my Saviour. When you add it all up, it really isn't "just enough" any more. The windows of Heaven have been opened up for me!! I was just too blinded by my sin to see all the blessings that already surround me.
I'm so glad that the God of Elijah, is my God. I'm thankful that He has not changed, that His Word is truth, and that all of His promises are for me too!!! The drought may continue for years to come. Oh, that I would learn to enjoy His provision - even if it is "just enough."
Thursday, May 2, 2013
Breakfast for a Week! In 5 minutes?
Since the arrival of Genevieve, I have been looking high and low for solutions to two major problems: time & money. So, when I discovered something that would do both, I had to try it! I took on the breakfast challenge. How to make sure the Hubbs could get a HEALTHY, quick breakfast, every morning before work - WITHOUT having to spend extra money. Enter the solution. Via Pinterest...duh!
Dan enjoys eating steel cut oats in the morning, along with his new found love, Chobani. That's great! Such a healthy, protein-packed breakfast, what wife wouldn't want to make that for her husband?! Yeah, have you ever actually cooked steel cut oats? It. Takes. For. Ever! With the addition of the wee one, I seriously don't have time for that. But, I do have time for Pinterest (lol), and when I saw the headline: "Breakfast for a Week in 5 Minutes", along with a photo of steel cut oats, I felt like I'd hit the jackpot! Once I read through the original post, I went to Target to pick up a few things & got to work! Once it was done, I was shocked at how easy it was. Then felt sorta stupid for not thinking of it sooner. Doh!
Here's the super-easy, way to make a healthy breakfast for an entire week, in just about 5 mins.

First, grab some mason jars. I went with half-pint, but probably should have gone with the pint, so Hubbs could actually mix in some goodies. Then, of course, pick up some oats! There are a few brands out there, but Quaker was on sale, so it's what I got.

Line up the jars next to the stove, so you're ready to go.

Once the water & oats have come to a boil....


simply ladle the water & oats into the jars...

close the lids & walk away!

Leave them out on the counter over night. Then, in the morning, put all of the jars into the fridge, minus one.

Take that one, add a bit of milk & sugar, or whatever suits your
fancy & you've got a tasty breakfast now AND for the rest of the week!

Look at that face! Who knew something so easy, could make him so happy?! lol!!
Here's the recipe, as taken from the post:
1. Collect your jars and other equipment. I like pint-sized
jars for this as they allow a little more room for adding nuts, raisins,
and milk later. But you can also use half-pint jars.
2. Bring the oats, water and salt to a boil. Simmer for about 3 minutes then turn off the heat.
3. Ladle the oats and water into the jars. Cover the jars tightly with their caps and rings. Leave on the counter overnight.
4. The next morning, put all but one of the jars in the refrigerator. Take the cap off one jar and stir up the oatmeal inside. Microwave for 2 to 3 minutes, or until quite hot. Add any milk, raisins, or other mix-ins. Enjoy!
That's it! Easy, right?! Thanks, again, Pinterest!
Subscribe to:
Posts (Atom)