In an attempt to cut back wherever possible, I have decided to take on the challenge of making our sandwich and dinner roll bread. If it works, I'll be saving us loads of money! If not, well, at least I can say I tried, and I'd only be out 10 bucks.
I totally forgot to take pictures throughout my first attempt, but here's the result.

They didn't turn out *too* bad; but they definitely did not turn out the way I intended. After talking with a few of my friends (including the one who gave me the recipe), I came to the conclusion that I did not let the bread rise enough. The bread tasted fantastic! But, because they did not rise enough, the loaves were super dense and had a squishy texture in the middle. Not good enough for sandwiches, but they worked out great for snacking! We gobbled up all four loaves in 3 days!
Well, today, I decided to give it another go & I'm glad I did! I still need to keep a better eye on the rising, but I am pleased with the results. And, I remembered to take pictures this time!
First, I pulled out my mixer, put the kneading hook on & gathered up all my ingredients.
 |
| Flour, sugar, yeast, salt, olive oil, warm water |

I put the warm water into the mixer, added the yeast & let it sit for a few minutes.

While that was sitting, I combined the rest of the dry ingredients & mixed them well.
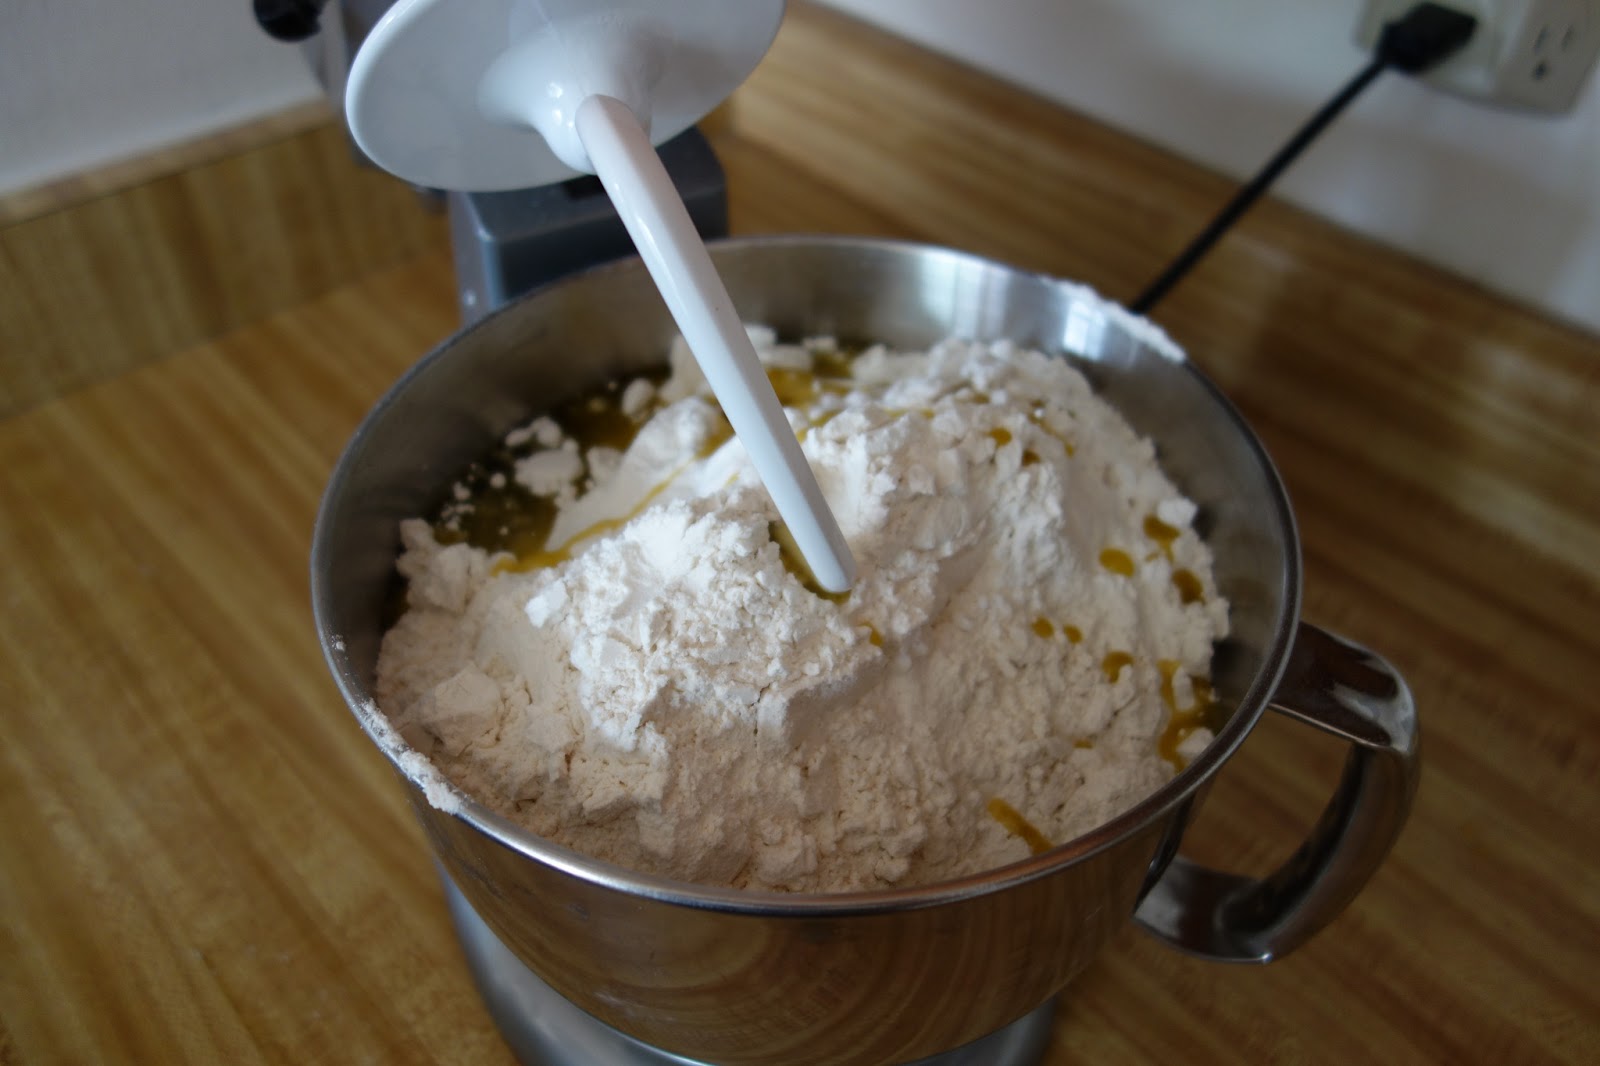
Once the yeast/water was ready, I dumped the dry ingredients into the mixer. When I turned around, I saw the oil! I probably should have tossed that in before the dry ingredients, but I don't think it really mattered.

I put the mixer on "stir" for a minute, then put it up to 2 for 2 minutes. The dough came out perfect!

I decided to only do 2 loaves this time, so I halved the dough.

I took one of the halves & split it again, into the shape of 2 loaves....

...I placed them on a plate lined with parchment paper & when they were frozen, I put them into a ziploc bag & back into the freezer to bake another day.

I placed the other half of the dough into a bowl & then placed it into a warmish oven to rise for about 25 minutes. (I left the oven door open. I was afraid it would start to bake! lol)

I can't believe I didn't take a picture of it, but once the dough had had doubled in size, I shaped it into 2 loaves. I placed each one in a greased (I used Pam) bread pan.....

....then back into the warmish oven for the second rise.

I kept the bread in the warmish oven for 15 minutes. Then, I placed them on top of the oven, to finish raising (is that a word?) while the oven pre-heated.

Here's what they looked like just before going in the oven. Looks good, so far!

I baked them for 20 mins & put them on the counter to cool. Here's what they look like from the side....

Pretty good, right?! The one on the left was a bit too short & was more dense than I wanted. But, it was way better than before! The loaf on the right was more of what I was looking for. I think I needed them to rise a bit longer, but all in all, they turned out great! I'm looking forward to getting this right & making this work. The bread is super tasty & will be great for sandwiches & rolls!
Here's the recipe I used. It makes 4 loaves. OH! Make note that the original recipe calls for INSTANT yeast. I bought DRY ACTIVE yeast & that's why I had to do the double rise. If you use the instant yeast, follow the directions below. If you use the dry active yeast, then you'll need to do what I did, and have the dough rise twice. Once in the bowl & then again in the loaf pans.
Ingredients: 10 1/2 cups white unbleached bread flour (a 25lb bag of flour is only 7 bucks at Costco! That's the same price as 2 loaves of bread! What a savings!)
1/2 cup sugar
1 tbsp salt
3 rounded tbsp Instant Yeast (This also can be purchased at Costco. It was $5, and will last quite a while)
3 tbsp liquid lecithin* (veg. or olive oil ok to use. I used olive oil.)
4 cups warm tap water
Instructions: Mix dry ingredients. Add lecithin/oil and water. Mix for 1 minute and check consistency. If dough is too dry, add more water. If dough is too moist, add more flour. Mix for 5 minutes. If you have a Kitchenaid mixer, you'll only need to mix for 2 minutes. (Do not add water or flour to the dough after it has finished mixing.)
To cook now- Spray counter and pans with Pam. Shape loaves and cover with a dish towel. Let raise 25 minutes, or until dough has doubled in size. Bake at 350 degrees for 20-25 minutes.
To freeze- form the bread into the shape that you will be cooking it in (rolls, bread-sticks, or a loaf) and put in freezer on a cookie sheet until stiff. Take off of the cookie sheet and place in a labeled freezer bag. Leave rolls out approximately 3 hours before cooking and bread about 4. Add toppings (cheese or spices) to the bread-sticks just before baking.
***For wheat bread: Use 3 cups water and 1 cup applesauce. I also exchange my white sugar for brown sugar and add some honey for honey wheat. I tend to allow my wheat bread far more rise time in an effort to keep it from being too dense.
I have no idea the actual cost of each loaf, but I'm guessing it's just over a buck. NICE! Not only will we have great tasting bread, but it will be made with only real ingredients, and will be saving us money. I think I hit the jackpot with this one! =D
The only problem with homemade bread is that it goes way too fast in our house. :-) I have made bread for years and love it. I can't wait to try your recipe. It looks much easier than mine and makes two more loaves.
ReplyDeleteWe could have that problem here too! That's why I decided to only bake 2 at a time. lol Lemme know if it works out for you!
DeleteGood job! Just wait til you try the wheat version. I've even begun exchanging brown sugar for some of the white sugar in even the white bread, lol.
ReplyDeleteHey, I like your blog, your like superwoman! I'm making your cowboy casserole this week. God bless!
ReplyDeletelol! Hardly superwoman, but thanks! =D
Delete